



FPse for android v11.211 APK

Pse for Android is the fastest and most compatible PSone emulator for handheld devices.(also known as PSX or Playstation 1)

Minecraft: Pocket Edition v1.18.2 APK

Imagine it, build it. Create worlds on the go with Minecraft – Pocket EditionThe new Minecraft – Pocket Edition allows you to build on the go.

PPSSPP Gold – PSP emulator

Play PSP games on your Android device, at high definition with extra features!

Angry Birds 2 v2.37.0 [Mod] APK

The Angry Birds are back in the sequel to the biggest mobile game of all time!

ES File Explorer File Manager v4.2.1.9 APK

FaceApp Pro v3.4.12.2 [Unlocked] APK

Tampilkan postingan dengan label ROM. Tampilkan semua postingan

Rabu, 26 Juni 2013

Update Galaxy Y to Android 4.1.2 with Jelly Bean Taste Custom ROM

The Galaxy Y will no longer receive official updates from Samsung due to hardware limitations, but if you still want to enjoy the latest features and apps on your own handsets, then you should consider in flashing a custom ROM firmware. Fortunately for you, those of xda-developers have been working on providing suitable custom updates for your Galaxy Y, so in order to help you out, during the present step by step guide we will be checking on how to flash the new Jelly Bean 4.1.2 powered Taste custom ROM.
If you choose to flash the Android 4.1.2 Taste firmware on your Samsung Galaxy Y S5360, then you will be able to power up the performances of your smartphone because the ROM comes with new features, apps and capabilities that will optimize and customize the system of your phone. That’s why, after completing this tutorial, you will be able to gain more speed, improve the battery life, change the looks and the UI, access the internal system and perform important changes to your Galaxy Y OS, not to mention that the Jelly Bean 4.1.2 platform will be installed above all.
So, if you are looking forward in testing the Jelly Bean Taste custom software for your Galaxy Y, then make sure that you are reading all the lines from this guide, or else you might end up in bricking your phone. This is a complex and risky operation, so be careful in what you apply. In order to successfully perform the update method, check the list from below, and only after that begin the proper flashing procedure.
  • The Jelly Bean Taste platform is a custom ROM and not an official Android 4.1.2 update released by Samsung for your Galaxy Y S5360. This means that by flashing the same, you will void the warranty of your device.
  • If something bad happens, or if you manage to mess things up, then you will be by yourselves.
  • The warranty can be restored though; all you have to do is to downgrade to stock OS (follow one of our guides by going to our “update Samsung Galaxy Y” page).
  • Now, before starting the proper installation procedure, you need to ensure that your phone is rooted and installed with a custom recovery image, like CWM recovery.
  • The root access must be gained because a custom ROM can be flashed only on an unchained system; then after rooting, you have to install the custom recovery image because the stock recovery can’t be used when trying to apply unofficial firmwares.
  • Shortly after completing the lines from above you also have to backup the Galaxy Y data.
  • A wipe will be required, so it is strongly recommended to save your personal info, text messages, contacts list, EFS, call logs, market apps, internet settings and everything else you need to.
  • Also, use the custom recovery tool and apply a Nandroid backup for saving the current ROM.
  • Then, a computer or notebook must be near you; furthermore, your Galaxy Y and its USB cable will also be used on the update operation.
  • On both computer and smartphone you need to deactivate or uninstall all the security tools; the programs are usually interfering with the installation procedure.
  • Enable the USB debugging option on your phone or else you will not be able to properly connect the device with the computer.
  • Your handset must be charged (at least ensure that there is more than 60% power left) or else it might get turned off in the middle of the update operation.
  • Remember that this step by step guide is compatible only with the Samsung Galaxy Y model number S5360; don’t try to install the Jelly Bean 4.1.2 Taste custom ROM on a similar phone as you will risk in bricking your Android based device.

How to Update Galaxy Y to Android 4.1.2 with Jelly Bean Taste Custom ROM Firmware

  1. On your computer download the update file by using the link from here.
  2. Don’t extract the file, just place it on the desktop.
  3. Then, connect your handset with the computer by using its USB cord.
  4. Select the downloaded file and copy – paste / drag and drop the same from the computer to your phone’s SD card.
  5. Unplug the USB cable as the computer is no longer needed.
  6. Turn off the Galaxy Y; reboot it into recovery mode.
  7. Then, by using the recovery mode menu first of all you need to wipe the system.
  8. For the wiping process choose “wipe data factory reset” and “wipe cache partition” (remember to backup the data first).
  9. Return to the main menu by selecting “+++go back+++”.
  10. From the recovery menu this time choose “install zip from sd card” followed by “choose zip from sd card”.
  11. Pick the update file from the SD card and flash the same on your phone.
  12. When the installation procedure is over, you will have to select “+++go back+++” followed by “reboot system now”.
  13. Note: if in the end your Galaxy Y will get stuck in a boot loop, you will have to: reboot into recovery mode once more; from there select “wipe data factory reset” and “wipe cache partition”; reboot your device as everything should be working perfect now.
That’s it for now; your Samsung Galaxy Y has been updated to Android 4.1.2 with Jelly Bean Taste custom ROM firmware. Test the software and see how it performs on your phone; in case you notice bugs or things that aren’t working properly share the same with our team and with other users that might want to complete this tutorial, by using the comments area from below.

Custom Rom - Hyperion 8 for Galaxy Y!

Custom Rom - Hyperion 8 for Galaxy Y!

Finally we are posting on our first custom rom tested by us! Hyperion 8!!

Firstly let me define what is custom rom!!
As you all people know ROM stands for Read Only Memory! In the case of Android its your OS with all the stock apps!
Stock ROM is the one that you get with your smartphone. It would have a lot of bloatware consuming your storage!
Whereas Custom ROM is customised by some developer to his own ways and keeps only the apps that are needed to run.

Kernel is one that will the main part of your ROM like a heart! It has various settings to keep your phone healthy, perform well, save battery and overclock as well!

Many Custom Roms have bugs but this one doesnt!! Believe me!! I have tested it for 2 weeks!

Description as given by the developer CarlDeanCatabay:-

JellyBean experience at its best
Everything you love about Hyperion and
JellyBean — the gorgeous UI , fast and fluid
performance, battery life — is everything you’ll
love about the new Hyperion, too. And you can
have the best of both it in one ROM.
A rom worthy of all Galaxy Y
Fast performance, superb stability, mouth
watering UI, useful features — It's something for
everyone. And Everything!
Incredible performance
Known for its fast, fluid performance, Hyperion
doesn’t disappoint. It features 23 powerful and
power-efficient CPU governors and 4 I/O
Scheduler, which makes everything you do feel
smooth and natural.
Hyperion wouldn’t be Hyperion without
incredible battery life . Even with so much
performance packed into such a small space, it
still lasts up to 2 days on a single charge* . So
you can read, watch, play, write, and create
whatever you want, as long as you want.
*battery life based on moderate usage with all
radios turned on at default policy settings.

Hyperion 8 highlights:
Total ear-gasm: ALSA ( AlsaProject) + Beats
Audio Engine v2
We combined and tuned up two sound engines
for superb sound quality when listening to
music. This time, sound enhancements are
activated at startup without the use of DSP
Manager. What does that mean? No more force
close when you connect/disconnect mass storage
mode on PC.
Mouth watering pixel goodness
Like JellyBean looks but sluggish like old granny?
Worry no more! Hyperion 8 combines JellyBean
UI and transparency into a piece of art. We don't
simply take frameworks, systemUI and put it in a
blender. We make sure we put "what belongs
together".
Project butter Hyperion style
We combined all the best tweaks out there for a
superb super smooth UI. Others would say "No!
That's not real! Project butter is JB only", yes
that is correct if you can't read between the
lines.
More juice more fun!
We hate running out of juice as much as you do,
so we made sure you can get the most of your
battery. We put 23 CPU governors and 5 IO
schedulers to tame that nasty CPU! And with
deep sleep? Your phone will get more sleep
than you do! -well at least for me this is a true
statement.

Features:
Basic - all custom roms must have:
1. De-Odexed
2. Zipaligned
3. Recompressed APKS
4. Optimized APK Images
5. Rooted
6. BusyBox and BusyBox run-parts support
7. Apps2SDenabled

Common - though not working in other roms:
1. 15 Toggle Notification Drawer
2. 6 Lockscreens from Gingerbread AOSP/CM with
custom app starter and gesture unlock
3. Status bar Tweaks + TEAM battery bar
4. 4-way Reboot Options
5. Expanded Power Menu (because themers and
mods crash systemUI most of the time, we need
other ways of rebooting)

Unique - not all custom roms have:
1. No SMS Bug
2. No false Android version
3. No useless features
4. Least branding (Like creed parts or cod parts or
whatever. We don't like that. It's your phone,
not ours)

Advanced:
1. EXT4 File System Support
2. CIFS
3. Swap Support
4. BaCeM Tweak
5. UnderVolt Support
6. Firewall Support (DroidWall Open-Source Project)
7. Ad-blocking host file

Plus - only Hyperion:
1. Supercharged Hyperion Core v2 with Adrenaline
Engine v4.4
2. Transparent JellyBean user interface
3. Ear-gasmic sound quality
4. Integrated Autostart manager, Firewall and
Network Unlocker
5. Modular system structure
6. System Replacer

Experimental:
1. Force GPU Rendering - Force use of GPU for 2D
rendering
2. Disable HW overlays - Always use GPU for screen
compositing
3. Allow purging of assets - Purging of bitmap
memory assets allows freeing of more RAM when
needed (you can now get as low as 85-90mb
used RAM)
4. 32bit transparency - Better graphics
performance and full transparency support

It comes with savie kernel which saves battery a lot through various cpu settings and management!!


Now the steps and requirements!!

Requirements:-
1.Rooted phone (click here to know how to root)
2.CWM
3.Rom

Backup all your apps and contacts through titanium backup or any other app of your choice!


Steps:-
1.Switch off your phone and go to recovery by pressing volume up+home+power button

2.Go to install from sd and patch CWM by opening it!

3. Now go to Mounts & storage and mount everything. System, sd card, sd ext, data

4. Go back to Advanced and clear battery stats and dalvic cache.

5. Go back and select clear data. It will format your phone. Now select clear cache

6. Go to install zip from sd > apply zip from sd card. Locate the rom zip file and select it! This will install the rom!

7. After installation completed go back and reboot!

8. First reboot may take time! At the Galaxy Y logo about 1.20mins and at the hyperion logo around 2minutes! Your phone will have a fresh look and have a fresh start!!

Enjoy!!

Just remember 3 steps! Mount everything, Clear everything, install zip!!


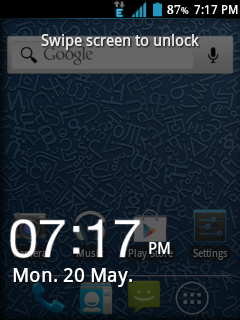
Here are some screenshots of the ROM from my phone!!


Wifi bug fixed:-
Go to wifi settings>advanced>sleep policy>never

No other problems or bugs!!

Note:-We are not responsible for any loss of your phone! If your phone is bricked ,dont worry its a soft one. You can correct it manually or go to your Service centre

Like us on facebook:-

GalaxyGamerZone

Tags:-
Hyperion 8, custom rom, galaxy y, best galaxy y rom, bug free rom galaxy y, hyperion 8 project 2013, hyperion 8 build 2, hyperion 8 for galaxy y free download

Update Galaxy S3 GT-I9300 to Android 4.2.2 Jelly Bean via SentinelROM [How to Install]

Update Galaxy S3 GT-I9300 to Android 4.2.2 Jelly Bean via SentinelROM
Galaxy S3 GT-I9300 users can now enjoy the latest custom features of Android 4.2.2 Jelly Bean firmware, thanks to the release of SentinelROM by XDA Developers recognised contributor, Sentinel196. Earlier, the same XDA Developers member released the SentinelROM for Galaxy S2 I9100 to squeeze every ounce of power from the phone for top-notch performance with excellent battery-life.
The custom ROM is reportedly compiled with Linaro toolchain from modded CyanogenMod 10.1 (CM10.1) source, and is one of the most popular ROMs for Nexus 10, Nexus 7, Nexus 4 and HTC One X.
The SentinelROM is built to enhance the CM10.1 features, besides offering faster gaming and web browsing experience as well as excellent battery-life. The ROM is reportedly more stable and functional than the CyanogenMod nightly ROMs that are not fully optimised for performance.
Here is the complete list of features supported on SentinelROM:
  • FOLLOW IBTIMES
  • Google Plus

  • Compiled with Linaro toolchain for extreme performance
  • Zip Aligned
  • Compiled from latest CyanogenMod 10.1 source by Sentinel196, not a 'cooked ROM'.
  • Increased volume (not quiet like most CM based ROMs)
  • LMT Pie Controls
  • OTA Updates supported
  • Improved Web Browsing performance
  • Improved 3D gaming performance
  • Amazing battery-life
  • Additional theming and UI customisation
  • FAST support via this page and SentinelROM Facebook Page
  • A free copy of my music player app
Key Points to Note

Samsung Galaxy S3 GT-I9300 gets a high-scoring result while running Android 4.2.2 SentinelROM in AnTuTu Benchmark (credit: XDA Developers)
  • CyanogenMod 10.1 based SentinelROM and the instructions given in this guide are applicable to the international variant Galaxy S3 GT-I9300 model only and will not work on any other device. Verify your device's model number by navigating to Settings > About Phone.
  • Verify that the correct USB drivers are installed for Galaxy S4 on your computer (download Galaxy S3 GT-I9300 USB drivers)
  • Back up important data and settings on the phone. It is recommended that you use one of the custom recovery tools such as ClockworkMod (CWM) or TWRP for data backup, as it creates a backup with complete image of your current phone setup. Avoid using Samsung KIES or ROM manager, as they lack flexible options for data backup and may cause issues with the newly installed firmware.
  • Ensure USB Debugging mode is enabled on the phone by navigating to Settings > Developer Options (if the phone is running Android 4.0 or later) or go to Settings > Applications > Development (if the device is running Android 2.3 or earlier). If your device is running Android 4.2 or later, do the following steps:
  • Go to Settings > About Phone
  • Scroll down to the bottom and select Build Number
  • Tap Build Number about seven times until the hidden Developer Options is unlocked or revealed under Settings. Then enable USB Debugging mode by selecting the checkbox.
  • Ensure that the device has at least 85 percent battery charge.
  • Make sure that the phone is factory unlocked and rooted with ClockworkMod (CWM) recovery installed on it.
  • Double check to confirm that Wipe Cache partition and Dalvik Cache Wipe is done before continuing from the Recovery Mode
  • Samsung KIES will not recognise your phone after installing the firmware, as it is a custom release.
  • The instructions provided in this guide are meant for reference purpose only. IBTimes UK reminds its readers that it will not be held liable if the device is damaged or bricked during or after the ROM installation. Users are advised to proceed at their own risk.
How to Install Android 4.2.2 Jelly Bean Based SentinelROM on Galaxy S3 GT-I9300

Step 1 - Download Android 4.2.2 SentintelROM v4.60 and Google Apps for Galaxy S3 GT-I9300 on your computer.
Step 2 - Connect and mount the Galaxy S3 USB mass storage on computer with USB cable.
Step 3 - Copy the downloaded ROM and Google Apps zip files to the root folder on your phone's SD card.
Step 4 - Power off your phone and disconnect its USB cable from computer.
Step 5 - Press and hold Volume Up, Home and Power buttons together until the phone boots into CWM Recovery. Now, take a Nandroid Backup of your phone's existing ROM, so that it can be restored later if the new ROM fails to boot, or you want to return to the previous ROM. To create a backup, click Backup and Restore and then hit Backup again on next screen.
Step 6 - Perform a full data wipe in recovery. To do so, perform Wipe Data/Factory Reset and wait until the process completes. Then perform Wipe Cache Partition followed by Wipe Dalvik Cache from advance option in recovery. Then navigate to Flash zip from SD card option and hit Power button to select it.
Step 7 - Tap the Power button again and click Choose zip from SD card.
Step 8 - Use Volume keys to navigate to Android 4.2.2 SentintelROM zip file that you copied earlier to your phone and select it by tapping the Power button. Confirm the ROM installation on next screen and the installation procedure will begin.
NOTE: Repeat this step (Step 8) for installing Google Apps as well.
Step 9 - Once both the SentinelROM and Google Apps are installed, hit Go Back and choose Reboot System Now in the Recovery menu. The phone will reboot automatically and the first boot may take about five minutes to complete. So, leave it alone.
Your Galaxy S3 GT-I9300 is now running on the latest CM10.1 based SentinelROM custom ROM. Go to Settings > About Phone to verify the firmware installed.

Minggu, 23 Juni 2013

Autorun Manager PRO v4.2 APK

Do you want control over startup apps? Autorun Manager gives it!

Senin, 10 Juni 2013

Franco Kernel Updater

It's a simple tool to download and update franco.Kernel for the Galaxy Nexus!

Minggu, 26 Mei 2013

franco.Kernel updater v9.5.2 APK


It's a simple tool to download and update franco.Kernel for the Galaxy Nexus!